Files
Scanning the repository...
| Files | |
|---|---|
| gerberfiles | |
| pictures | |
| ESP8266-ESP12.lbr | |
| README.md | |
| XM1584.lbr | |
| dirt_cheap_dirty_boards.v1.cam | |
| dirt_cheap_dirty_boards.v1.dru | |
| esp12_RGBWW.brd | |
| esp12_RGBWW.sch | |
| fhem.logo.lbr |
README.mdESP8266 WiFi RGBWW LED Dimmer v1.5

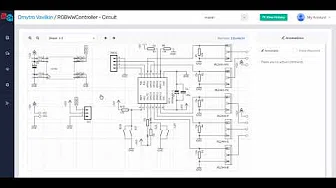
Custom Hardware board for controlling 5 Led Channels via PWM (RGB + Warm/Cold White). It is designed for max current ~4.5A per Channel.

Changelog
1.5 (31.01.2017)
- DCDC wandler has been remeasured and provided for through hole mounting on pin headers
- Jumper introduced for allowing for external 3,3V connections
- measurements have been changed to 53mm*47mm with mounting holes tailored towards "Strapubox CO 4" casing
- C1 has been replaced with a smaller form factor
1.3 (20.02.2016)
- added another tact switch which can be used during boot to reset settings
- silksceen naming updated
1.2 (16.02.2016)
- improved the layout for better EMV
- added buffer capacitor for dc converter
- added filter capacitor close to ESP8266
1.1 (01.02.2016)
- connected ADC
- some layout improvements
Parts
- 1x ESP8266, ESP-12 format
- 1x XM1584 Power converter (set to 3.3v!)
- 5x IRLZ44N Mosfet (logic level gate threshold)
- 11x 10k resistors, 0805 (R1 - R11)
- 1x 1k resistors, 0805 (R12)
- 1x 330 µF Elko RM 2.5 mm (C1)
- 1x 100 µF Elko RM 2.5 mm (C3)
- 1x 100 nF capacitor 0805(C2)
- 3x 5,08mm 2pin terminal block
- 1x 5,08mm 3pin terminal block
- 1x 2,54mm 4pin header
- 2x Micro SMD Tact Switch 2 pin 362.5 mm (optional)
Assembly
Assembly of the PCB Board is straight forward, solder all parts to the PCB.
Caution : before soldering the esp module to the PCB, set the output voltage of XM1584 converter to 3.3v
Recommended steps
- Start with soldering the smd resistors
- Ensure the output voltage of XM1584 converter is 3.3v before continuing.
- Solder the XM1584 Power Board
- Solder ESP8266 Module
- Optional: solder SMD Tact Switch
- Solder Elkos
- Solder Terminal Blocks, 4pin header
- Solder FETs
Firmware
Firmware is still work in progress.
Latest can be found here: https://github.com/patrickjahns/esp_rgbww_controller_fw
Modifying
The schematic and board files are compatible with eagle 7.2+
Ideas
Here are some ideas for future revisions - see if we can clear some GPIOs and provide them via PIN Header for other enhancements (i.e. IR / Rotary Controller) - change layout for VCC/GND to be on the left side - ~~connect ADC to detect power failure~~
Resources
Thread in Fhem Forum
Credits
Thanks to RiRomain for his excellent documentated ESP RGB Project


