Files
Last update 8 months 4 weeks
by Doug Harriman
readme.mdWorkflow
Note: For all operations, keep grbl software running and maintain XY home position.
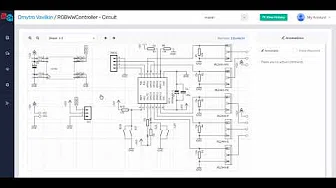
Note: CADLAB.io view of github repo. Login with google account.
PCB Prep
- Clean the PCB with metal polisher to remove oxidation. I use Brasso. PCB should be shiny and clean.
- Spray paint the PCB. Ideally would use solder mask, but the epoxy material is hard to fully ablate. Paint ablates nicely, though it is prone to scratching.
Design Prep
- Panelize PCB using KiKit. Use to provide frame and tabs with mousebites. The
kikit.shscript performs the process.- Load the panelized PCB into KiCAD.
- Export a PCB image for laser ablation of the paint to expose the trace isolation areas. Use the KiCAD "plot" function. The image below shows the settings, assuming we're exposing the back side copper.
PCB Fabrication
- Tape down PCB on mill. Rough cut the PCB to size if that makes sense.
- Expect to route/drill through the PCB into the supporting material, so use a sacrificial material.
- Drill all holes, including tooling holes.
- It is recommended
- Route out panel from larger PCB. Limit size of PCB we're working with to maintain chem etch solution.
- Laser ablate spray paint in the PCB trace inverse to expose the copper for etching.
- Chem etch the PCB to isolate the traces.
- Laser ablate the spray paint on the solder pads.
PCB Milling Operations
- Milling operations are generated using
pcb2gcode. This is a command line program that reads information from configuration files. pcb2gcodeis called multiple times with different configuration files to generate the different G-code jobs (with different tools) required to machine out the PCB.
KiCAD
KiCAD Gerber export: disable the "Use extended X2 format" option.
PCB2GCODE
Alternate software: https://sourceforge.net/p/pygerber2gcode/code/ci/master/tree/
- This tool worked great for generating G-code.
- Much easier to use than FlatCAM.
- Man page in file
pcb2gcode.pdf.
- Example config file:
millproject - Generate code by running
pcb2gcodein the same directory withmillproject. - Use a short list of drill sizes, or it will use exact drill size for each part. That can lead to a lot of tooling changes.
- You can get some parameter by editing and running
pcb_calcs.py.- The copper layer is very thin. Got nice isolation with a margin of 0.5, could probably go lower.
- This calcs the Z depth for drilling and edge cuts to cut into the tape. It can be a bit tricky if you don't apply the height map. Not clear if you can apply the height map to multiple files.
- Bridges shouldn't be necessary if you don't cut too fast on the edge cuts.
- Example call: https://gist.github.com/bullestock/87ed51aaadaae8b8d2f085756652eb04
Soldermask & Silkscreen
Intended process is to apply two layers of soldermask/ink to the PCB, then use my UV laser to ablate the areas that I don't want filled in. Overall technique from: https://www.youtube.com/watch?v=NuJlgw7E7vg.
Soldermask & silkscreen cating goes down nicely with silkscreen netting & squeegee.
- Use a squeegee to spread the ink. I used Silicone squeegee from Amazon.
- Cure with UV light. I use a resin printer cure station for 3 min with board leaning against lamp.


